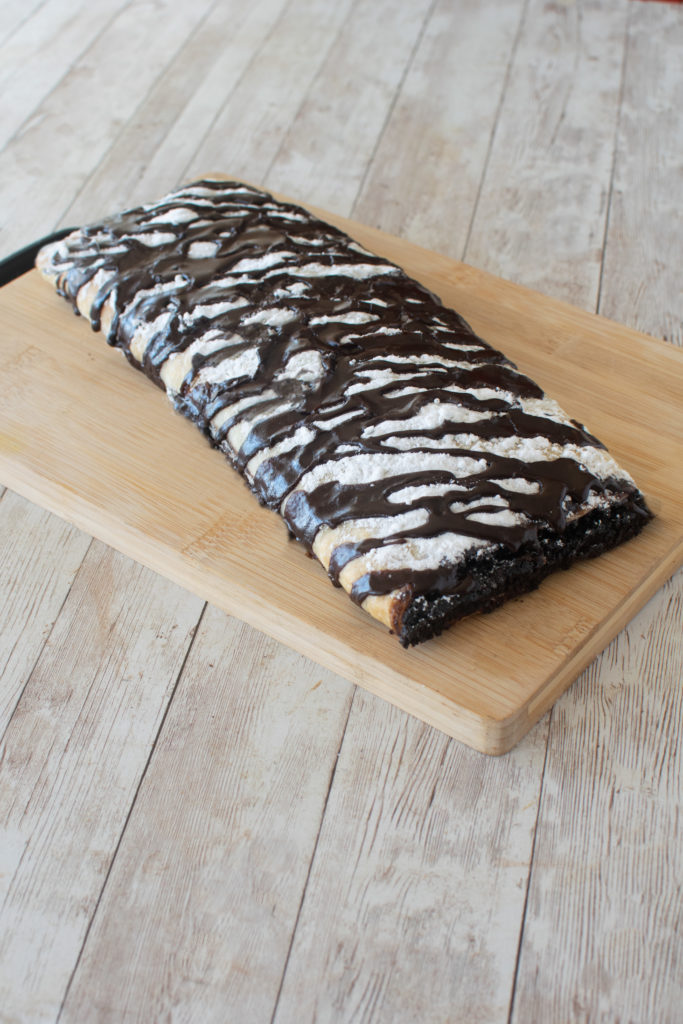
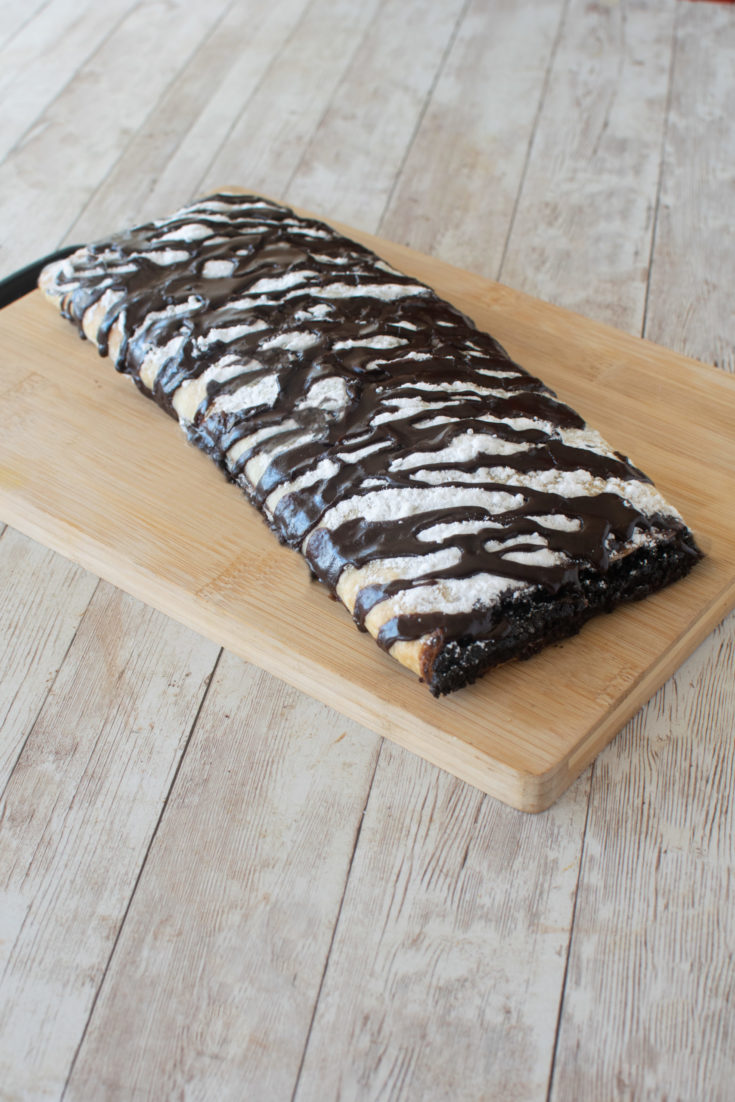
Really Easy Brownie Pastry is a brownie filled strudel pastry dessert. Melt-in-your-your-mouth chocolatey deliciousness! And…it’s dairy free!
Really Easy Brownie Pastry is one of the most impressive easy desserts you will ever make!
The instructions may seem complicated at first glance, but I promise that this is just so easy!
Just place the filling on the dough, roll, and bake! That’s all there is to it.
This dessert can be made flat more rounded. To make it rounder, the batter needs to be thicker, so add a bit more flour (a little at a time until reaching a thicker consistency).
When it comes out of the oven, just sprinkle with powdered sugar and drizzle with chocolate topping (shown in recipe).
Prefer individual bars? Try Really Easy Brownie Pastry Bars.
If I can bake, anyone can
I am the type of person who, when she sees something that looks easy to create, will try to do just that. It doesn’t really matter what it is.
And if I don’t at first succeed, I will continue to try and try until I complete the project or until I decide that I have at least given it my best effort and have had enough.
For example, when my eldest son (I have 5) sent me a video of an apartment he was thinking of renting, I saw a painting on a wall. The canvas was completely covered with uneven clouds of various colors and a long line of white squiggled randomly over it. My first thought was why something so simple could actually be considered a work of art, and my second thought was, Hey, I totally can paint something like that, and I did (MUCH smaller, of course).
But then there was the picture with crayon drippings in various beautiful colors (I am a sucker for colors). I had a bunch of old crayons, and I tried it. However, when I heated them to melt, the colors kept dripping across one another, and I couldn’t get them to drip straight down in their own paths. The repeated attempts didn’t pan out too well, and not only did I get crayon drippings on the canvas, I got them all over the kitchen. So, THAT was one of those times where I agreed with myself to give up.
And there have been so many other projects (people like me are a thing—we will spend $80 to craft something that would cost $5.99 to buy in the store).
Anyway, so, one day after a visit to a bakery one day, I decided that I should totally try baking (I could already cook).
I started with chocolate chip cookies. While chocolate chip cookies aren’t hard to make, and they always come out tasting good (unless I forget to take them out of the oven on time and they burn), I found it a challenge to get them to come out the way I had envisioned.
Sometimes they came out too cakey, sometimes too dry, sometimes too flat, and sometimes they spread out into one another.
But every so often, they would even come out just right. And it was those times—and the fact that my kids loved them no matter how they came out—that gave me encouragement to try again. And again. And again.
My next attempt at baking was birthday cakes. I am not sure why I decided to do this since the boxed kind are perfectly fine, but whatever.
I started with a 9″x13″ pan, and those sheet cakes came out fine, but they weren’t “real” birthday cakes. You know, like a round one. With layers.
So, I baked a cake with layers.
As with the sheet cakes, it came out tasting terrific, but the layers weren’t flat and the cake came out lopsided. Like with other things, I tried over and over (we have a lot of birthdays), but the layers always came out unlevel. I solved the problem by filling out the valleys with frosting.
I knew that when this happens, the layers need to be leveled off by cutting away the excess, but that would’ve meant removing too much, and I would’ve ended up with a very short cake, so I wouldn’t do it.
Luckily, I did find out that there is a way to prevent uneven layers, which is by using baking strips. Simple as that.
I did learn a very valuable lesson while I was still struggling with the lopsidedness of my cakes, and that was NEVER to put frosting on the cake until the layers have completely cooled because if the layers are still hot, or even warm, the frosting will get runny. Not only will this prevent a nicely decorated cake, but if it is not level, everything you put on top of the cake will…slide…right…off. Seriously.
Actually, I learned another lesson as well. If you have unevenness in your layers, just cut the higher portion of the cake (the part that you would cut off to make it level) horizontally down the middle and flip the top part of that over on to the lower part of the layer, it will mostly level it off. THEN you can spread on the frosting and decorate without losing height.
Talking about height, with the issue of the uneven cake layers solved, the next thing I wanted to improve was the height of my cakes. For some reason, I didn’t think that the layered cakes that were higher were probably three-layer cakes. I just thought that my two-layer cake should be higher. So, I did what any person who didn’t bother to do ANY research would do. I doubled the recipe.
Just like before, the cake came out tasting good, but it was no longer moist and fluffy. In fact, it was kind of heavy.
I am pretty sure now that my issues with baking were because of the way that I cook because I am the type who can eyeball some of the ingredients, and the food still comes out good.
That is NOT so with baking. At least not with me.
Anyway, so back to my heavy cake.
I couldn’t figure out what was wrong, and I complained to my daughter, Elissa, about how my cake wasn’t coming out like it used to, and her first question was the obvious.
“Mom, did you follow the instructions?”
I told her, “Yes, I followed the directions. But look at it!”
Elissa insisted that I must’ve done SOMETHING wrong and decided that she would make the same cake (she always follows directions) and see how HERS came out. So, I read the instructions to her while she made the batter.
When Elissa’s cake came out just as heavy as mine, she almost cried, but I felt kind of gratified that whatever was wrong wasn’t MY fault. Ha!
Then she asked to see the recipe for herself so she could see what could possibly have gone wrong, and she was surprised.
“These are half of the quantities that you read to me. You doubled the recipe. Why??”
I told her that I wanted a higher cake.
“That is NOT considered following directions. The recipe is for two pans, and you put double in each pan, so it couldn’t rise.”
Oh.
I took back my “ha” and never did THAT again.
So, I learned that I need to follow instructions better when baking. Fine.
One day, while I was in the kitchen baking something and yes, following instructions, Elissa walked in.
“Mom. You are NOT really measuring oil in the palm of your hand, are you?!”
I told her I was in a rush and didn’t want to take the time to look for the measuring spoons in the baking drawer, it was only a tablespoon, and I certainly know what a tablespoon of oil should look like, even in my hand. At least I wasn’t trying to measure a cup.
Sheesh.
Sometimes, when someone is very familiar with a recipe, they might be able to make little adaptations to some of the ingredients, but overall, it’s a good idea to remember to follow instructions and measure properly when you are making cakes or cookies or whatever it is you are trying to bake.
Baking Pantry Essentials
I never know when someone in my family is going to want a dessert at home, to bring to a friend’s house, or need for an event, so I like to make sure I can bake anything with very short notice. To that end, I keep a variety of supplies and ingredients in the house that will allow me to do just that.
I can’t tell you how many times I was glad to have whatever I needed within reach for the last-minute visitor or for when one of my kids went to a friend or had a school event without much prior notice.
I have slowly collected things over the years as I needed them (or if I found a good sale) and like to keep more than one of the smaller items, in case I don’t want to wash dishes in the middle of baking.
My basic “equipment” includes:
- a stand mixer, which I use mostly for dough and, sometimes whipping
- a hand mixer (for things that aren’t dough and I don’t want to mix manually)
- a small scale
- different sizes and shapes of baking pans, including loaf pans
- mixing bowls (or just large bowls—I have plastic, glass, and metal)
- cookie sheets
- pie dishes
- dry measuring cups
- liquid measuring cups
- whisks
- rubber spatulas (really good for when you don’t want to leave anything in the bowl)
- rolling pins
- a baking mat for rolling out dough
- baking strips
- a good supply of baking (or parchment) paper (also round for layer cakes)
I can certainly get by without a lot of the above, but it makes baking so much simpler when I just have whatever I need at my fingertips.
In addition to the equipment, there are the baking ingredients that I try to keep in the house at all times:
- flour
- white granulated sugar
- brown sugar (light/dark—I usually keep dark)
- confectioners sugar (powdered sugar)
- salt
- baking powder
- baking soda
- cocoa powder
- ground cinnamon
- ground nutmeg
- ground ginger
- ground cloves
- baking chocolate
- chocolate chips
- instant dry yeast
- vanilla and/or vanilla sugar
- cooking oil/cooking spray
- margarine or butter
- eggs
- honey
- instant coffee
- various extracts (real or imitation)
I also make sure that I have the following on hand to be able to make a variety of fillings, frostings, and toppings:
- whipping cream
- powdered pudding mix
- powdered sugar
- a good chocolate spread
Then, there is the following to make last-minute quick desserts:
- packaged pie dough or ready-made pie crusts
- puff pastry dough
Lastly, it’s not a bad idea to keep fun toppings, such as chopped walnuts, raisins, and the oh-so-important container of sprinkles.
Benefits
Not only is this pasty delicious, but check out the benefits of chocolate!
Really Easy Brownie Pastry
Delicious dairy free brownie filled pastry.
Ingredients
- 1 sheet puff pastry dough (approximately 1 pound, rolled out to around 1/8" thick or so - mine comes out to approximately 16" x 10")
- 1/4 cup powdered (confectioner's) sugar
Filling
- 3/4 cup flour
- 3/4 cup cocoa powder
- 1 cup sugar
- 1/2 teaspoon salt
- 1/3 - 1/2 cup oil *
- 2 eggs
- 2 teaspoons vanilla extract (imitation is fine)
Chocolate topping (if desired)
- 1 cup powdered (confectioner's sugar)
- 2 tablespoons cocoa powder
- 2 - 3 tablespoons water or non-dairy milk substitute, such as oat milk*
Instructions
The Pastry
- In a bowl, mix the flour, cocoa powder, sugar and salt.
- Add oil, eggs, and vanilla extract and mix well.
- Spread or roll out pastry dough.
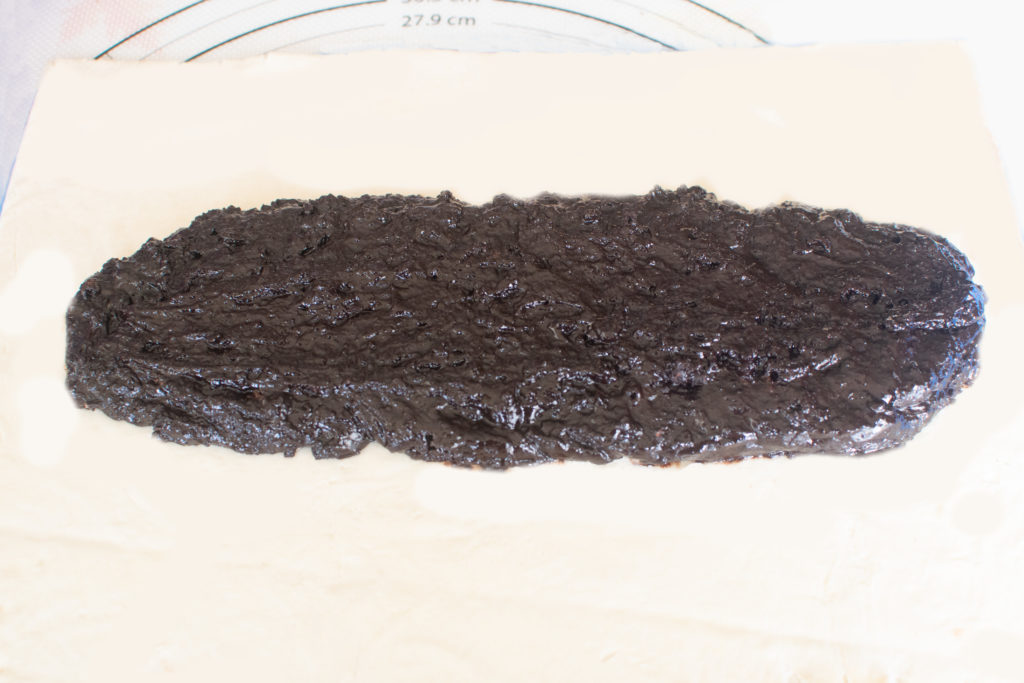
- Place the filling along the middle of the length of the dough so it is approximately 2-3 inches wide, starting an inch or two from one of the shorter edges.
- There should be approximately 12" of filling with an inch or two on the other side as well (if your filling isn't thick enough, it will seep out the sides, so to prevent this the dough should extend beyond the filling). **
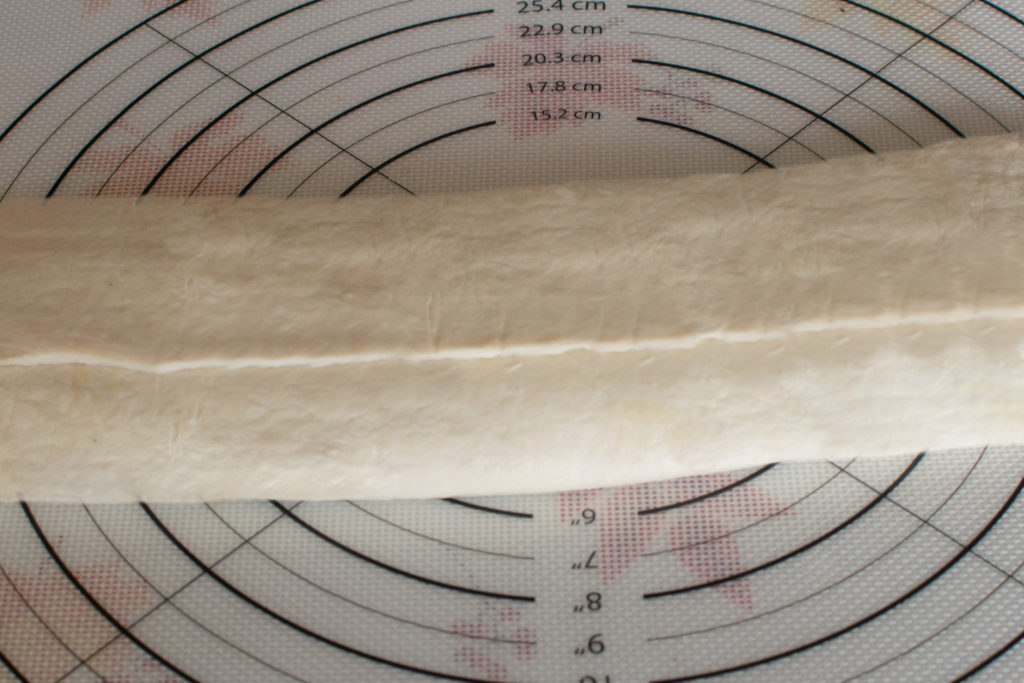
- Fold the long edges of the dough over the filling and overlap.
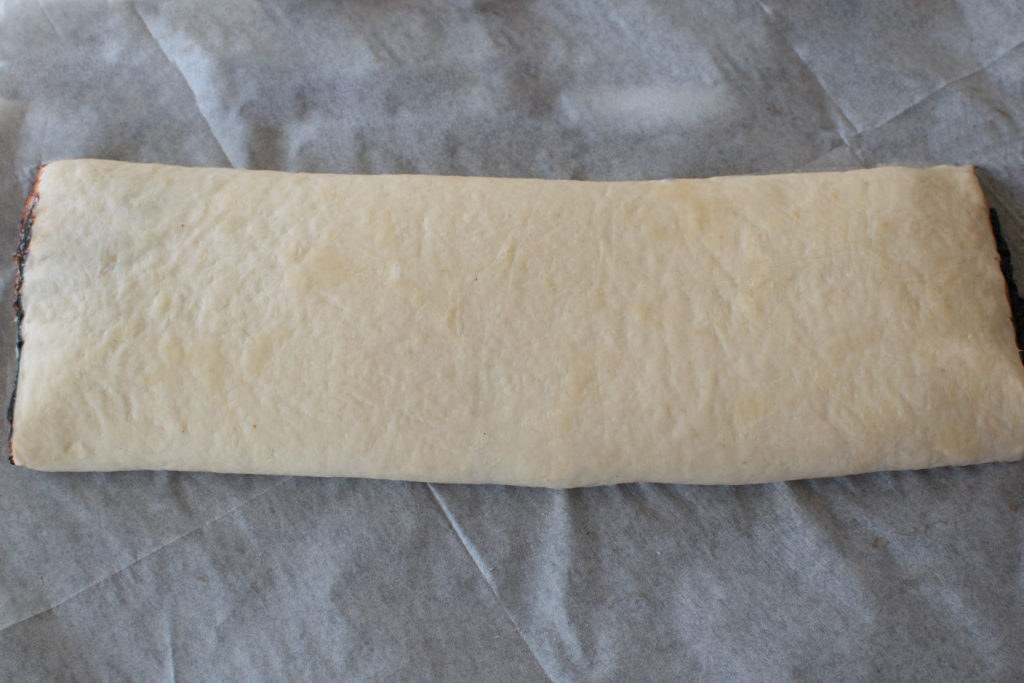
- Gently flip the dough over on to a lined or greased baking sheet.
- Place in a oven that has been preheated to 350°F and bake for 30 - 40 minutes until the dough has become a light golden brown.
- Remove from oven.
- Sprinkle powdered sugar over the top.
- Mix powdered sugar, cocoa.
- Add 2 tablespoons of liquid and mix well. Add up to one more tablespoon of liquid only if needed to be able to drizzle (if you add too much liquid, add a little more powdered sugar to compensate).
- Drizzle on top of strudel as desired.
The chocolate topping
Notes
* Add only 1/3 cup oil for a thicker filling.
** If the filling seeps out the ends while baking, you can leave or cut off.
Nutrition Information:
Yield:
8Serving Size:
1Amount Per Serving: Calories: 405Total Fat: 16gSaturated Fat: 4gTrans Fat: 0gUnsaturated Fat: 10gCholesterol: 47mgSodium: 279mgCarbohydrates: 60gFiber: 3gSugar: 28gProtein: 6g